
Introduction
My mom found an old KitchenAid mixer at a thrift store for $30. It had quite a bit of oil leaking from the band, so I decided to clean up the old grease and add new grease. I saw Mr. Mixer's YouTube shorts about re-greasing, so I followed his tutorials.
I bought a kit off Amazon that included a replacement gasket and the food grease. I decided to go with this instead of a off the shelf grease as I wanted to replace the gasket as well.
Disassembling the Mixer
The first few steps of disassembly went pretty well. I hit a snag trying to remove the pin on the planteary. I was hammering on the pin using a hammer and an allen key. It didn't seem to budge no matter the amount of hits I did. I sprayed some WD-40 on both sides of the pin and kept hitting it. Eventually, the pin did come out.


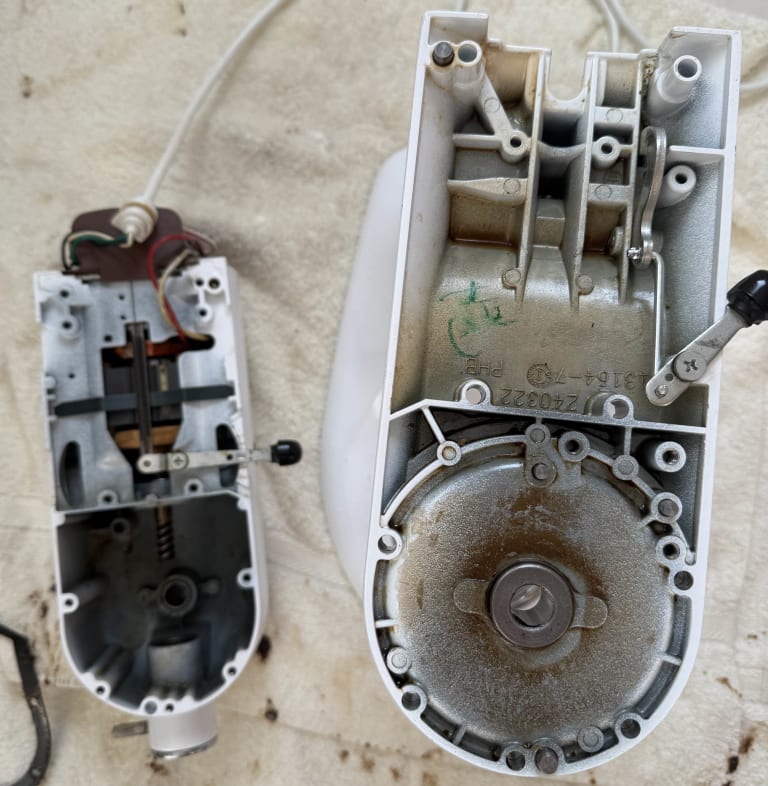
The rest of the disassembly went well. I noticed that one of my rear screws didn't have a locking washer, but I didn't have any spares to replace it.
Removing the Old Grease
With the machine apart, it was time to remove the old grease. I used the spatula in my kit to remove any large chunks. I then took some paper towel and wiped in large passes. I did have to hammer the worm gear's pin with a tapping bit I had.
After everything was removed, I remove the grease with a flat head, paper towels, and Q-tips. I went through each tooth with a paper towel with my fingernail pressing the paper towel into the teeth. The gears looked like they were in good condition, so I kept going until most of the grease was removed.


Adding the New Grease
I started re-greasing the machine with the included grease. I opted to add less than Mr. Mixer's video as I didn't want to run out. I still put enough so that each tooth was full of grease.


Reassembling the Mixer
Reassembly went pretty smoothly as well. I did need to hammer the pins back in, but it was easier than removal. The planetary pin was pretty hard to get in, but with enough taps it went in.

After plugging in the mixer, it seemed to run fine. It made some strange sounds at slower speeds, but at higher ones the sounds went away. It could be due to the higher speeds creating enough sounds to drown it out. I'm not sure if this was due to my disassembly, or if it was there before.

Conclusion
Mr. Mixer's video was very useful for re-greasing the mixer. The removing the pins were definitely the most difficult part of the project. I'll need to narrow down the source of the sounds.
Read more

Upgrading DSC System to DSC PC1832 and PK5500
Removing old DSC PC1500 panel to add EnvisaLink and Homekit

Adding DSC Classic series to HomeKit
Adding DSC PC1550 panel to HomeKit via dscKeybusInterface

Coleman 286A Lantern Cup and Knob Replacement
Replacing the pump cup and fuel knob for the lantern